If you're looking to enhance your space with a personal touch, creating 3D wall art can be a rewarding experience. You don't need to be a seasoned artist; even beginners can tackle projects like paper mache sculptures or cardboard geometric shapes with ease. These ten straightforward ideas not only allow you to express your creativity but also transform your walls into something truly unique. Curious about which projects require minimal materials and effort while delivering impressive results? Let's explore the possibilities that await you.
Key Elements
- Paper Mache Sculptures: Create playful designs using newspaper and flour, perfect for beginners to explore shapes and textures with paint finishes.
- Cardboard Geometric Shapes: Easily construct geometric forms from cardboard, allowing for creative painting and texturing to enhance visual appeal.
- Wire Sculptures: Bend and twist wire into simple shapes; this hands-on project develops fine motor skills while allowing for artistic expression.
- Painted 3D Letters: Personalize your space by crafting three-dimensional letters from cardboard, exploring various fonts and colors for a unique touch.
- Nature-Inspired Shadow Boxes: Combine natural elements in a layered shadow box to create a serene, themed display that brings the outdoors inside.
Paper Mache Sculptures
Paper mache sculptures are a fantastic way to immerse yourself in 3D wall art, and they're perfect for beginners. This medium allows you to explore creativity while using readily available materials like newspaper, flour, and water.
To start, gather your supplies: torn strips of newspaper, a flour-water paste, and a base mold, which could be anything from a balloon to a cardboard form.
When you begin, it's essential to layer your paper strips over the mold, ensuring each layer dries thoroughly before applying the next; this process builds strength and durability. You can create various shapes, from animals to abstract forms, allowing you to express your unique artistic vision.
Once your sculpture is dry, you can paint and embellish it, transforming your piece into a colorful representation of your style.
Engaging in this process not only fosters a sense of accomplishment but also provides an opportunity to connect with others who share your interests, whether through workshops, online forums, or local art groups.
Cardboard Geometric Shapes
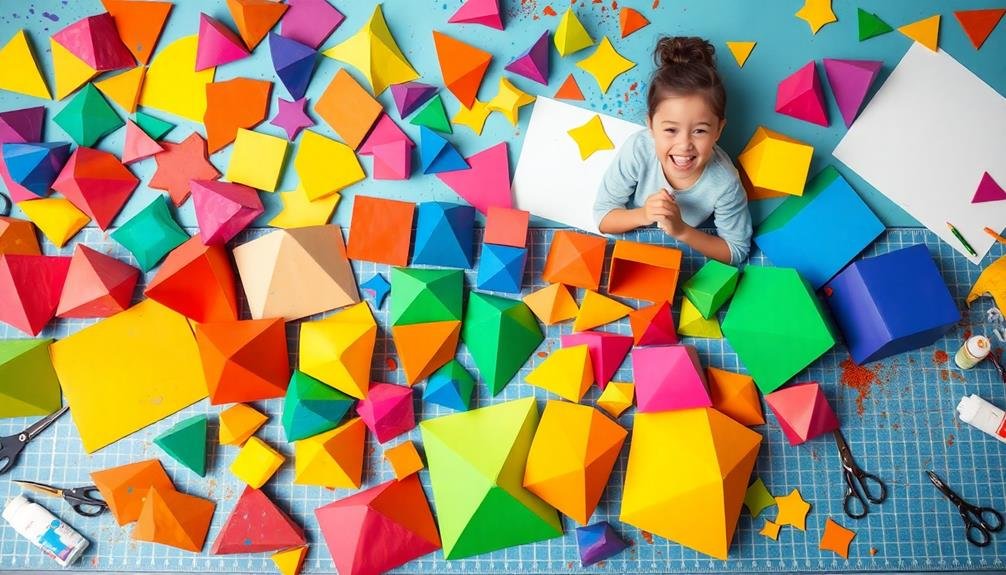
Creating cardboard geometric shapes is an exciting way to immerse yourself in the world of 3D wall art, and it's a perfect project for beginners. Utilizing simple materials like cardboard, scissors, and glue, you can craft various shapes, such as cubes, pyramids, and octahedrons, that add depth and dimension to your walls.
Start by sketching your desired shapes on cardboard sheets, ensuring to measure accurately so that you achieve precise cuts. Once cut, assemble these shapes by folding and adhering the edges, creating a solid form that can be painted or decorated to match your personal style.
You might choose to paint them in vibrant colors or apply textured finishes to enhance their visual appeal. For an engaging display, consider arranging multiple geometric shapes in a pattern on your wall, creating a striking focal point that invites admiration and sparks conversation among friends and family.
This project not only fosters creativity but also provides a sense of accomplishment as you transform simple cardboard into striking art. With each shape you create, you'll feel a growing connection to your artistic journey, enhancing your sense of belonging within the vibrant community of 3D art enthusiasts.
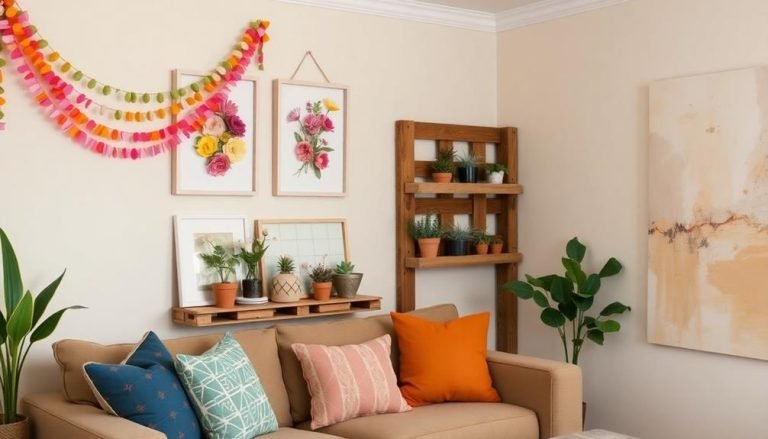
Fabric Wall Hangings
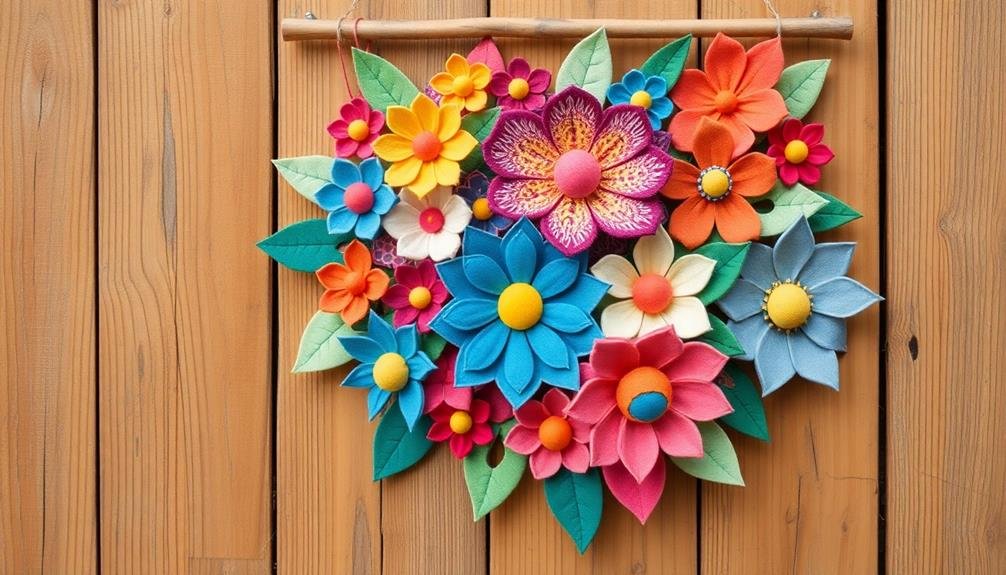
After exploring the world of cardboard geometric shapes, you might find yourself enthusiastic to experiment with different materials.
Fabric wall hangings offer a unique and versatile way to add texture and warmth to your space, allowing you to express your creativity while creating a sense of belonging. You can start by selecting fabrics that resonate with your personal style; consider cottons, linens, or even repurposed textiles, which can lend a distinctive character to your artwork.
To begin, cut your chosen fabric into various shapes or patterns, such as triangles, circles, or abstract forms. You can layer these pieces to create depth, attaching them to a canvas or wooden frame using fabric glue or staples.
For an added touch, embellish your wall hanging with embroidery, beads, or fringe, enhancing its visual appeal and tactile quality.
Moreover, consider incorporating meaningful quotes or phrases by painting or stitching them onto the fabric, fostering a deeper connection to your creation.
As you hang your finished piece, you'll not only beautify your living space but also cultivate a personal narrative that invites others to share in your artistic journey.
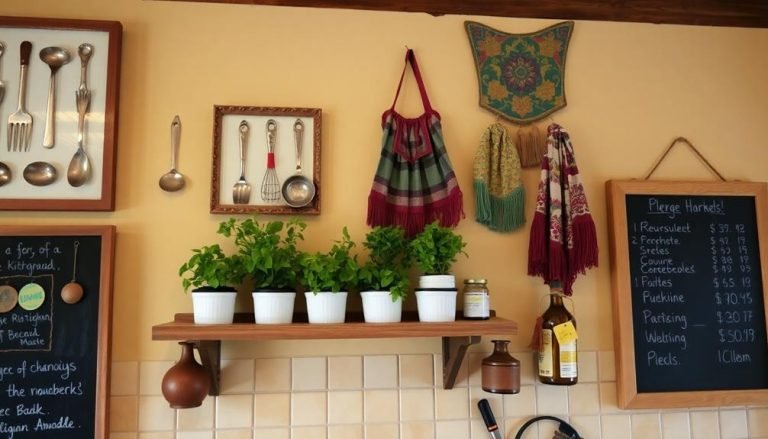
Wooden Block Art
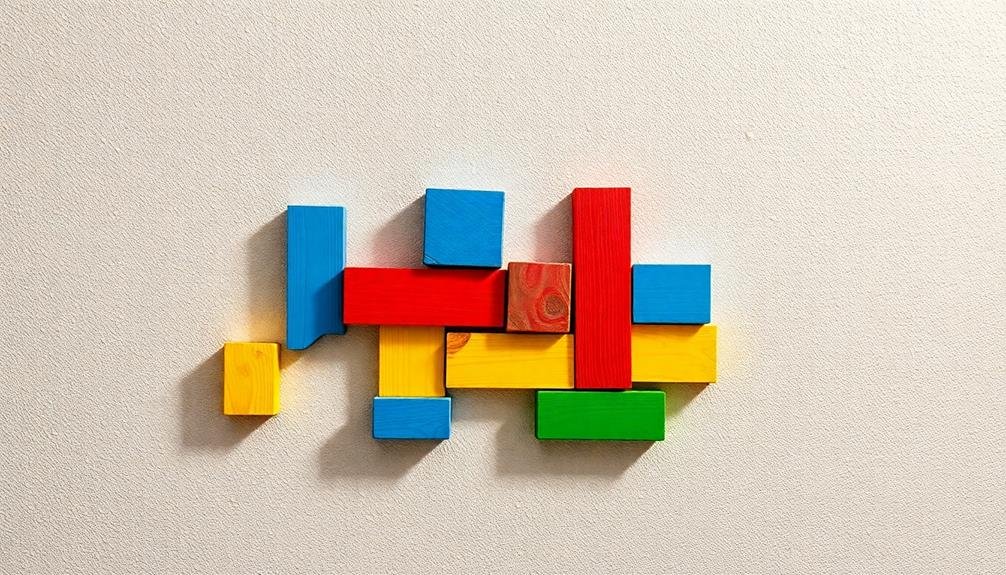
Have you ever considered how wooden blocks can transform your wall decor? Wooden block art is a versatile medium that not only brings a rustic charm to your space but also allows you to express your personal style in a unique way. By selecting blocks in varying sizes, colors, and textures, you can create visually intriguing patterns that draw the eye and stimulate conversation.
Incorporating elements like decorative throw pillows alongside your wooden block art can enhance the overall aesthetic of your room, leading to a cohesive and inviting atmosphere.
To get started, gather an assortment of wooden blocks—think about incorporating reclaimed wood for an eco-friendly touch. You can paint them in different shades, stain them for a more natural look, or even leave them raw to highlight their organic beauty.
Arrange your blocks in geometric shapes or opt for a more freeform layout, allowing your creativity to flow. For added depth, consider attaching blocks at varying distances from the wall, creating a three-dimensional effect that enhances the overall visual impact.
This project not only beautifies your home but also fosters a sense of belonging by showcasing your individuality. So gather your materials, embrace your creativity, and start crafting your wooden block art masterpiece that reflects who you're and where you belong.
Nature-Inspired Shadow Boxes
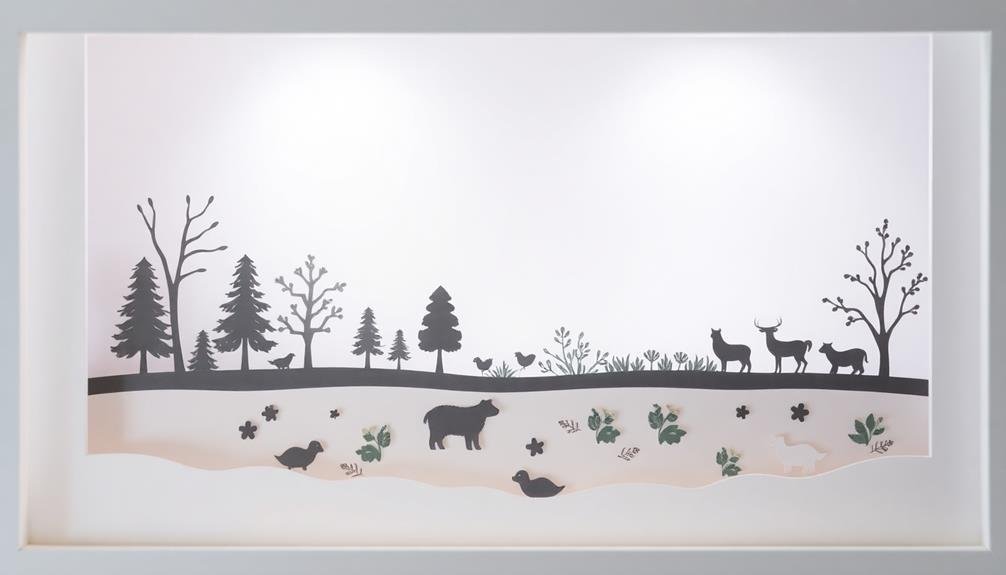
Incorporating elements from nature into your home decor can breathe life into your walls, and nature-inspired shadow boxes are a fantastic way to achieve this. These artistic creations allow you to showcase the beauty of the outdoors while adding a personal touch to your space.
By layering natural materials within a box frame, you create a three-dimensional effect that draws the eye and invites intrigue. To enhance the cozy atmosphere of your home, consider using warm color palettes and textures, which can complement your shadow box designs and create a harmonious feel throughout your space cozy atmosphere enhancements.
To inspire your creativity, consider these elements for your shadow boxes:
- Dried flowers or leaves
- Twigs and branches
- Small stones or pebbles
- Moss or lichen
- Feathers or shells
When assembling your shadow box, think about the arrangement and color palette. You can create a serene landscape by using muted tones, or opt for a vibrant display that reflects the energy of nature.
Secure your items with a strong adhesive, and don't hesitate to mix textures for added depth. Adding a glass front will protect your artwork while allowing it to shine.
Ultimately, nature-inspired shadow boxes not only enhance your decor but also foster a sense of connection to the natural world, transforming your living space into a haven of tranquility.
Canvas Relief Art
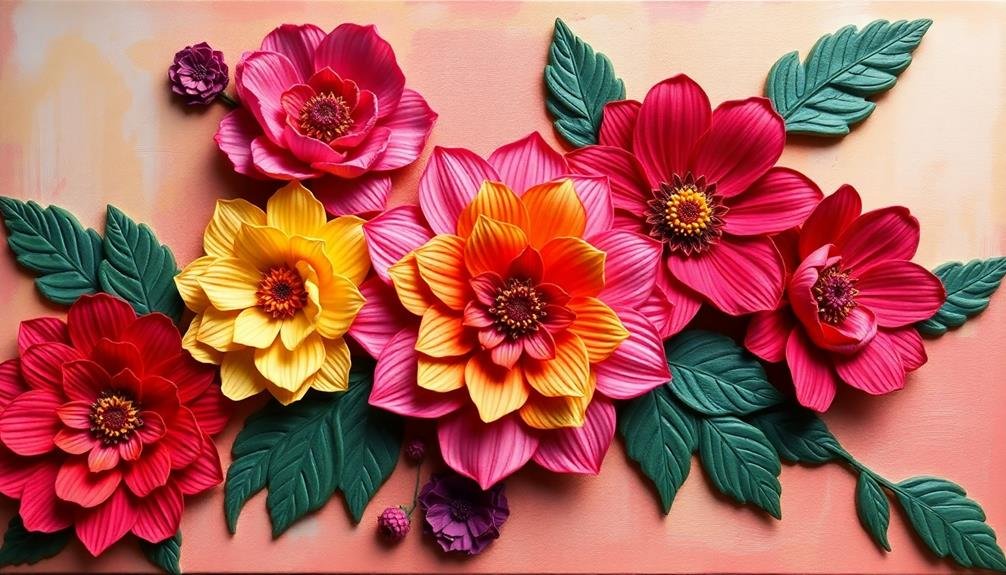
If you love the idea of adding dimension to your decor as seen in nature-inspired shadow boxes, canvas relief art offers an enchanting alternative. This technique involves layering various materials directly onto a canvas, resulting in a visually striking piece that invites viewers to appreciate its depth and texture.
You can explore the use of paper, fabric, paint, and even found objects like twigs or seashells to create a unique composition that reflects your personality.
To begin, choose a sturdy canvas as your base, and sketch a design that inspires you. Once your layout is established, start adhering your chosen materials, arranging them in a way that draws the eye. For instance, you might use textured paper to form flowers, while incorporating paint to add color and highlights.
Consider using a palette that harmonizes with your existing decor, ensuring your artwork complements your living space beautifully.
As you work, don't hesitate to experiment with various techniques, such as layering or overlapping, to create a more dynamic effect. The final masterpiece won't only enhance your environment but also serve as a conversation starter, fostering connections with those who appreciate your artistic expression.
String Art Designs
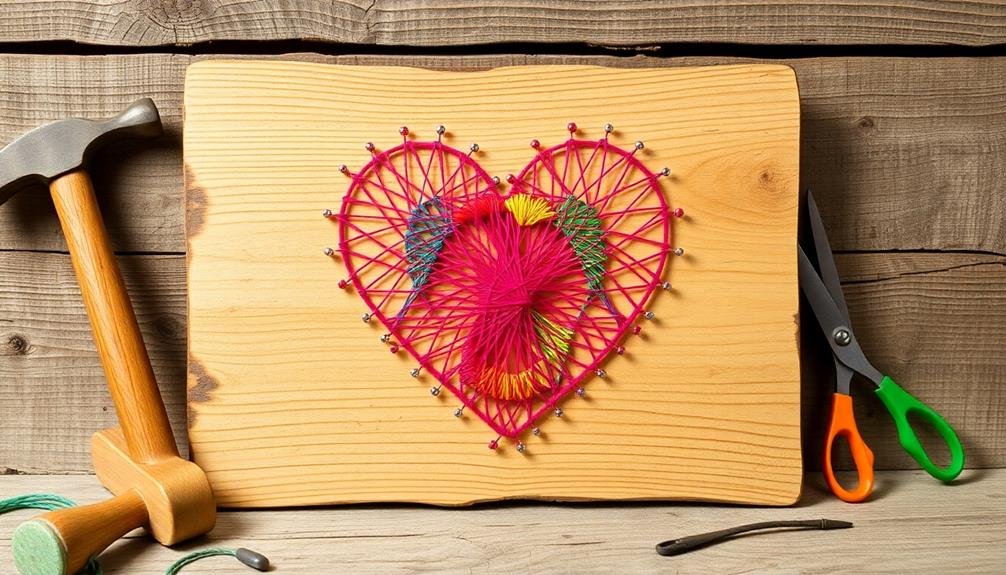
String art designs offer a creative way to transform simple materials into visually striking wall art, and you'll find that the process is both enjoyable and rewarding.
To get started, gather essential materials like wood, nails, and colorful thread, and then follow step-by-step instructions to create stunning patterns that can brighten up any space.
Understanding the techniques involved not only enhances your skills but also allows you to express your artistic vision in a unique format.
Materials Needed Overview
Gathering your materials is the first step to creating stunning string art designs. To commence this creative journey, you'll need a selection of essential items that won't only facilitate your project but also enhance its visual appeal.
Here's what you should gather:
- Wood Base: A sturdy wooden board serves as the foundation for your string art.
- Nails: Choose small, sharp nails to create the framework for your design.
- String or Yarn: Opt for colorful string or yarn to bring your design to life.
- Hammer: A reliable hammer is vital for driving the nails into the wood.
- Pattern Template: A printed template helps guide your nail placement for precision.
With these materials, you'll be well-equipped to plunge into the world of string art. Each item plays a vital role in ensuring your project turns out beautifully, so take your time selecting them.
As you gather these essentials, remember that each piece contributes to a larger artistic expression, inviting you to explore your creativity while connecting with others who share your passion.
Step-by-Step Instructions
To immerse yourself in your string art project, start by selecting a simple design that inspires you. Popular choices include geometric shapes or a heart, which can be created using just a few nails and colorful thread.
Once you've chosen your design, gather your materials: a wooden board, nails, a hammer, and string.
Begin by sketching your design lightly on the board. This will serve as a guide as you hammer the nails into place, ensuring they're evenly spaced and securely positioned. Aim for an approximate height of half an inch, allowing enough room for your thread to weave through.
After securing the nails, start wrapping the string around them; don't hesitate to experiment with different colors and patterns to create a unique piece.
As you weave, remember to pull the string taut but not overly tight, allowing for a balanced appearance. Once you've completed your design, tie off the string and trim any excess.
Upcycled Bottle Wall Decor

Upcycled Bottle Wall Decor
Looking for a creative way to spruce up your walls without breaking the bank? Upcycled bottle wall decor offers a sustainable solution that not only beautifies your space but also showcases your commitment to environmental responsibility.
Engaging in upcycling and repurposing allows you to transform ordinary bottles into stunning art pieces that reflect your unique style while contributing to a more sustainable lifestyle. With a few simple techniques, you can create unique decor that's both functional and visually appealing.
Consider these ideas to get started:
- Glass Bottle Planters: Cut bottles in half, fill them with soil, and plant succulents for a charming display.
- Painted Vases: Use acrylic paint to create vibrant patterns on bottles, turning them into eye-catching vases.
- Hanging Bottle Lanterns: Insert fairy lights into bottles, hang them from your walls, and create a warm, inviting atmosphere.
- Bottle Wall Collage: Arrange an assortment of bottles in varying sizes to form an engaging wall collage that tells a story.
- Recycled Bottle Art: Cut and reshape bottles to craft abstract sculptures that add depth and texture to your decor.
Wire Sculptures
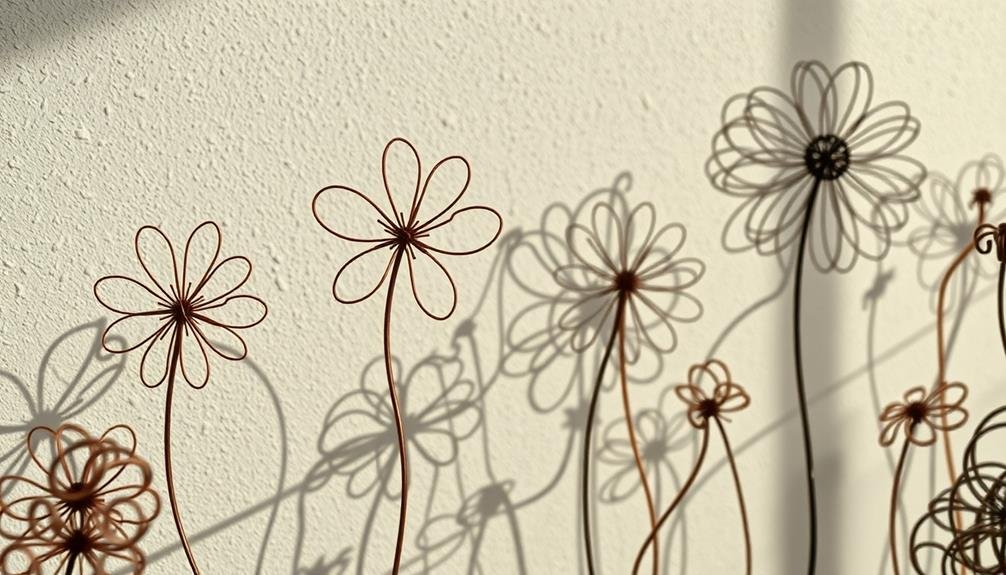
Creating wire sculptures can be an engaging way to express your artistic vision, and with just a few basic materials like aluminum wire and pliers, you can start crafting unique pieces.
By following simple techniques, such as bending and twisting the wire to form shapes, you'll discover how versatile this medium can be in representing three-dimensional art.
As you experiment with different forms and structures, you'll not only develop your skills but also gain a deeper appreciation for the intricacies of sculpture.
Materials Needed for Sculptures
When diving into wire sculptures, gathering the right materials is essential for a successful project.
Having the proper tools not only simplifies the process but also enhances your creative experience, allowing you to fully express your artistic vision.
Here's a concise list of materials you'll need:
- Wire: Choose various gauges, as different thicknesses provide unique characteristics and flexibility.
- Wire Cutters: Invest in a sturdy pair to easily manipulate and trim your wire to desired lengths.
- Pliers: Both needle-nose and round-nose pliers are beneficial for bending and shaping wire into intricate forms.
- Base Material: Consider a wooden block or sturdy foam as a foundation for stability; this allows your sculpture to stand tall and secure.
- Decorative Elements: Gather beads, paint, or fabric scraps to personalize your sculpture, adding texture and color that reflect your individual style.
Simple Techniques to Follow
Wire sculpture techniques can transform simple materials into stunning art pieces. Start by gathering materials like aluminum or copper wire, which are both malleable and sturdy, allowing for creative flexibility. Use pliers to bend and twist the wire into desired shapes, guaranteeing you maintain a secure grip as you work.
Begin with basic forms, such as spirals or abstract shapes, which lay the foundation for more intricate designs. When constructing your sculpture, consider layering different wire gauges to create depth; thicker wire can establish a strong base while thinner wire adds delicate details.
Don't hesitate to incorporate found objects like beads or stones, which can enhance the visual appeal and provide a personal touch. As you progress, focus on balance and proportion—stepping back periodically to evaluate your work helps guarantee harmony in your sculpture.
Lastly, experiment with various techniques like coiling, looping, and weaving to discover your unique style. By practicing these simple techniques, you can create beautiful wire sculptures that not only showcase your creativity but also invite you to connect with others who share your artistic passion.
Painted 3D Letters
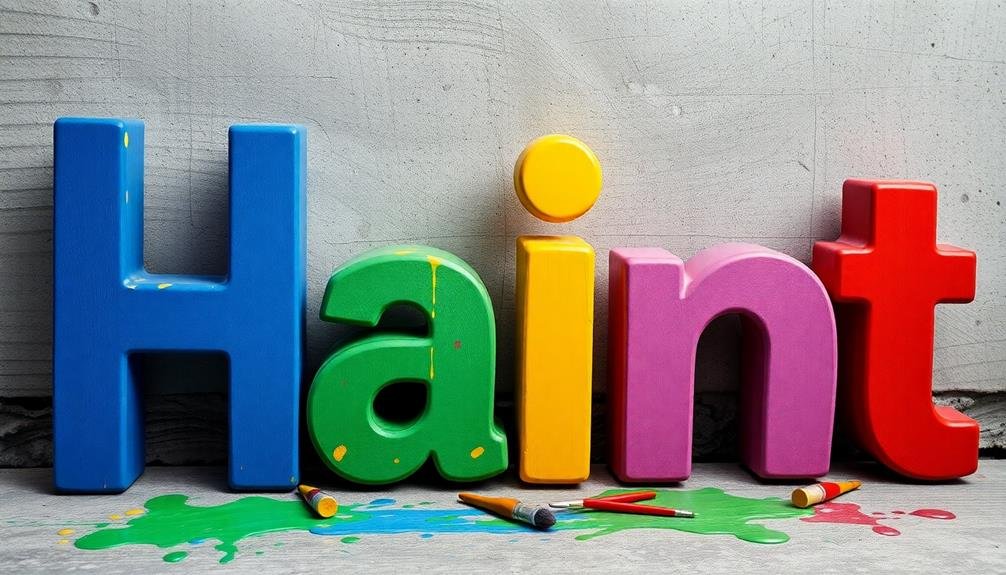
Painted 3D letters can transform your space with a unique touch that reflects your personality. By incorporating these artistic elements into your decor, you create an inviting atmosphere that speaks to who you are.
Here are some ideas to inspire your project:
- Choose a meaningful word or phrase that resonates with you.
- Use contrasting colors to make the letters pop against your wall.
- Experiment with various fonts to find one that fits your style.
- Incorporate textures, such as wood or metal, for added dimension.
- Consider adding embellishments, like flowers or geometric shapes, for extra flair.
To get started, gather materials like wooden letters, paint, and brushes. You may want to sketch your design before painting to visualize the final outcome.
After painting, arrange the letters on your wall, playing with spacing and alignment until you find a layout that feels right.
These painted 3D letters not only enhance your environment but also invite conversation, allowing you to share your story and create a sense of belonging with others.
Embrace the creativity, and let your personality shine through your wall art.
Frequently Asked Questions
What Tools Do I Need for 3D Wall Art Projects?
For your 3D wall art projects, you'll need basic tools like scissors, glue, a craft knife, and a cutting mat. Don't forget to gather materials like cardboard or foam board to bring your ideas to life!
How Do I Choose the Right Materials for My Project?
Choosing the right materials involves considering your project's theme and desired texture. Explore various options like wood, cardboard, or foam. Don't hesitate to experiment; it can lead to unique, personal touches that reflect your style.
Can Children Participate in These 3D Art Projects?
Absolutely, kids can plunge into these 3D art projects! Think of it as planting seeds of creativity; together, you'll nurture their imagination, helping them feel a sense of belonging through shared artistic exploration and fun.
Where Can I Find Inspiration for My Designs?
You can find inspiration for your designs by exploring online platforms like Pinterest or Instagram, visiting local art galleries, or joining community art groups. Engaging with others will spark creativity and help you feel connected.
How Do I Hang 3D Wall Art Securely?
When it comes to hanging 3D wall art securely, you've got to think outside the box. Use sturdy hooks or adhesive strips, ensuring they can bear the weight, and your art'll stay up beautifully.
Whats Next
In summary, starting on these ten 3D wall art projects not only ignites your creativity but also transforms your living space into a vibrant tapestry of personal expression. Imagine the tactile allure of a paper mache sculpture or the geometric precision of cardboard shapes adorning your walls, each piece telling its own story. By utilizing accessible materials and straightforward techniques, you can infuse depth and character into your home, making it a true reflection of your unique artistic vision.